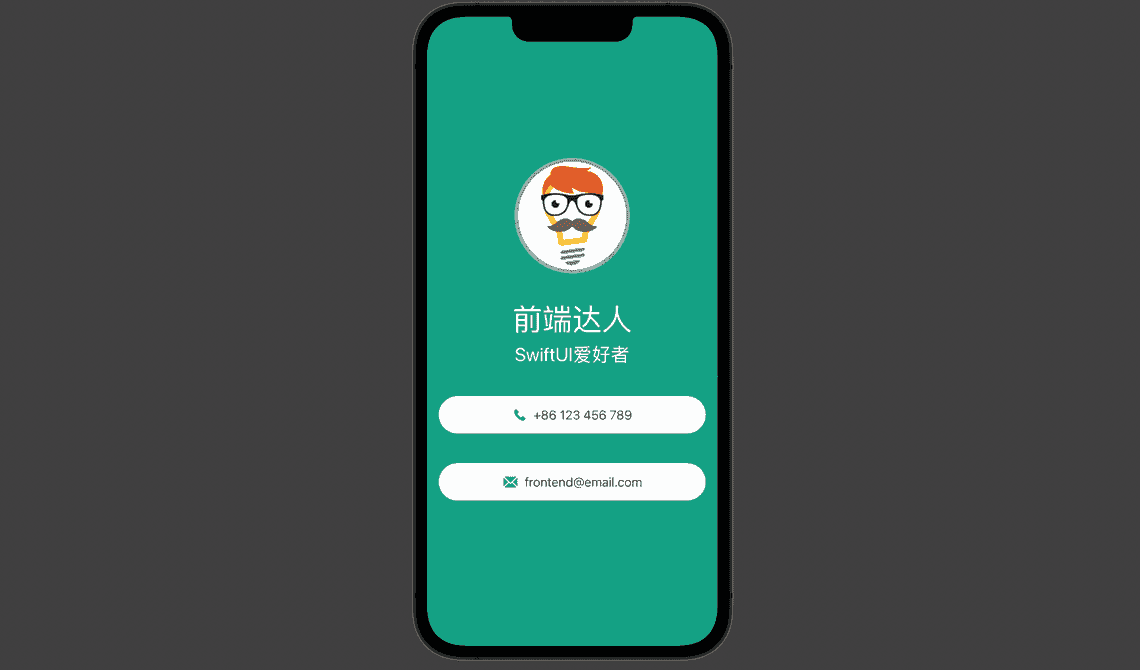
大家好,今天我们来做个简单的示例——个人展示页,虽然简单,但是非常常用,完成后的效果如下图所示:
此页面虽然简单,但是很漂亮。主要包含头像(图片)、作者名称(文字)、称谓(文字),一个电话键按钮(button)、邮箱键按钮(button)。

创建项目
基于以上设计,我们开始编写代码吧!首先我们创建一个名为 Card 的 SwiftUI 项目,在 ContenView 里编写代码,首先我们需要将所有的组件包裹在 ZSTack 容器里(背景视图在最底层,其他视图在其上面),如下代码所示:
ZStack {Color(red:0.09, green:0.63, blue:0.52).edgesIgnoringSafeArea(.all) // 使背景穿透安全区域VStack {// 其他组件使用 VStack 方式布局}}
个人头像
接下来我们在 VStack 容器里布局我们的头像,我们使用了 resizable() 让其适应规定容器大小 ,并使用 .fit 模式保持宽高比例不变。接下来我们使用 clipShape(Circle()) 的方式将头像裁切成圆形。头像的灰色边框怎么弄呢?这是我们需要使用 .overlay() 修饰器。完成后的代码如下所示:
Image("front").resizable().aspectRatio(contentMode: .fit).frame(width: 150.0, height: 150.0).clipShape(Circle()).overlay(Circle().stroke(Color.gray, lineWidth: 5))
标题文字信息
接下来,我们继续在 ZStack 容器里布局作者的名称和一句话介绍,文本布局比较简单,就不过多介绍了,如下所示:
Text("前端达人").font(Font.custom("Pacifico-Regular", size: 40)).bold().foregroundColor(.white)Text("SwiftUI爱好者").foregroundColor(.white).font(.system(size: 25))
按钮组件
最后我们需要布局最底端的两个按钮,由于这两个按钮的内容展现的形式是一样的,为了复用,我们需要将其单独新建个文件 InfoView,按钮的布局比较简单,唯一不同的是,为了重用,我们需要声明两个变量 text(文字),imageName(图标),方便我们调用时,进行传参。
struct InfoView: View {let text: Stringlet imageName: Stringvar body: some View {RoundedRectangle(cornerRadius: 25).fill(Color.white).frame(height: 50).overlay(HStack {Image(systemName: imageName).foregroundColor(.green)Text(text).foregroundColor(Color("Info Color"))// 在资源文件夹里定义颜色(分别定义浅色和深色模式下的颜色)}).padding(.all)}}
最后在 ContenView 文件里,调用我们定义的按钮组件
Divider() // 绘制一条分割线InfoView(text: "+86 123 456 789", imageName: "phone.fill")InfoView(text: "frontend@email.com", imageName: "envelope.fill")
最终的代码
到这里,我们的代码就完成了,是不是很简单,最终完成后的 ContentView 代码如下所示:
import SwiftUIstruct ContentView: View {var body: some View {ZStack {Color(red:0.09, green:0.63, blue:0.52).edgesIgnoringSafeArea(.all)VStack {Image("front").resizable().aspectRatio(contentMode: .fit).frame(width: 150.0, height: 150.0).clipShape(Circle()).overlay(Circle().stroke(Color.gray, lineWidth: 5))Text("前端达人").font(Font.custom("Pacifico-Regular", size: 40)).bold().foregroundColor(.white)Text("SwiftUI爱好者").foregroundColor(.white).font(.system(size: 25))Divider()InfoView(text: "+86 123 456 789", imageName: "phone.fill")InfoView(text: "frontend@email.com", imageName: "envelope.fill")}}}}struct ContentView_Previews: PreviewProvider {static var previews: some View {Group {ContentView().preferredColorScheme(.dark)}}}
版权声明
注:本文属于原创文章,版权属于「前端达人」公众号及 SwiftUI.cc 所有,谢绝一切形式的转载
更多精彩内容,请关注「前端达人」

Related Posts
其他技术
公众号:前端达人


